AI Card King needs a key of your own before it can read business cards. This guide takes you from nothing to a finished key: all free, no credit card. Just press whatever the red boxes point at.
One thing to note: Google AI Studio is only available in English, so those screenshots are in English. The Google Cloud console follows your own language setting, and the screenshots on this page have been switched to the language you are reading in.
Step 1: Sign in to your Google account
Open aistudio.google.com/apikey in your browser and sign in with your Google account. Any account will do, but it is easier to manage later if you use the one you normally use.
Step 2: Accept the AI Studio terms
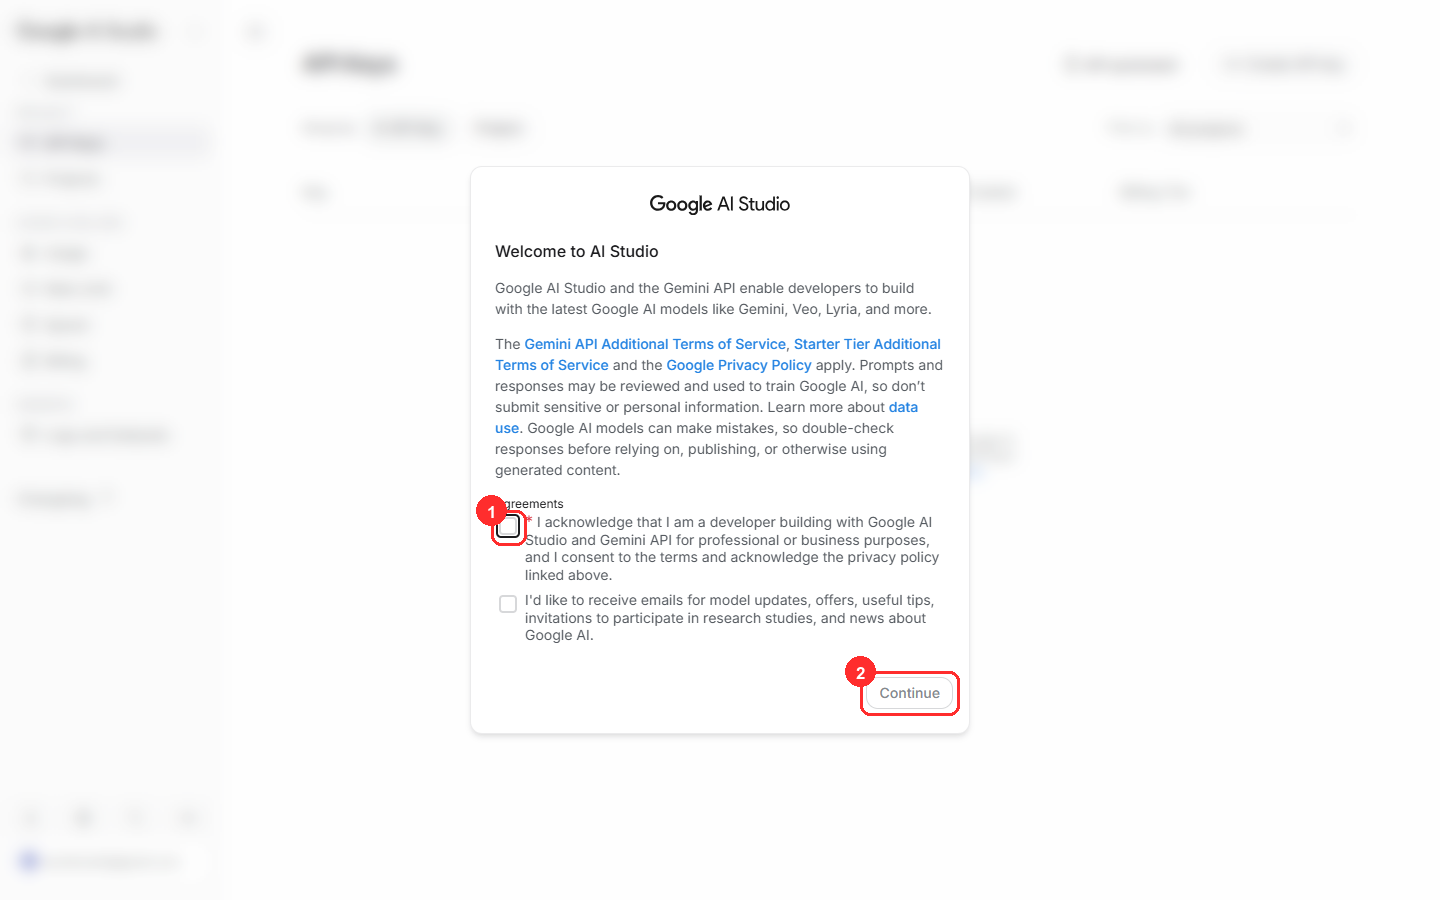
A welcome screen appears the first time you visit. ① is the tick box you have to check (confirming you have read the terms). The one below it, about receiving product emails, is optional — leave it unticked if you'd rather not get them. Once that is ticked, press ② Continue.
Step 3: Press Create API key
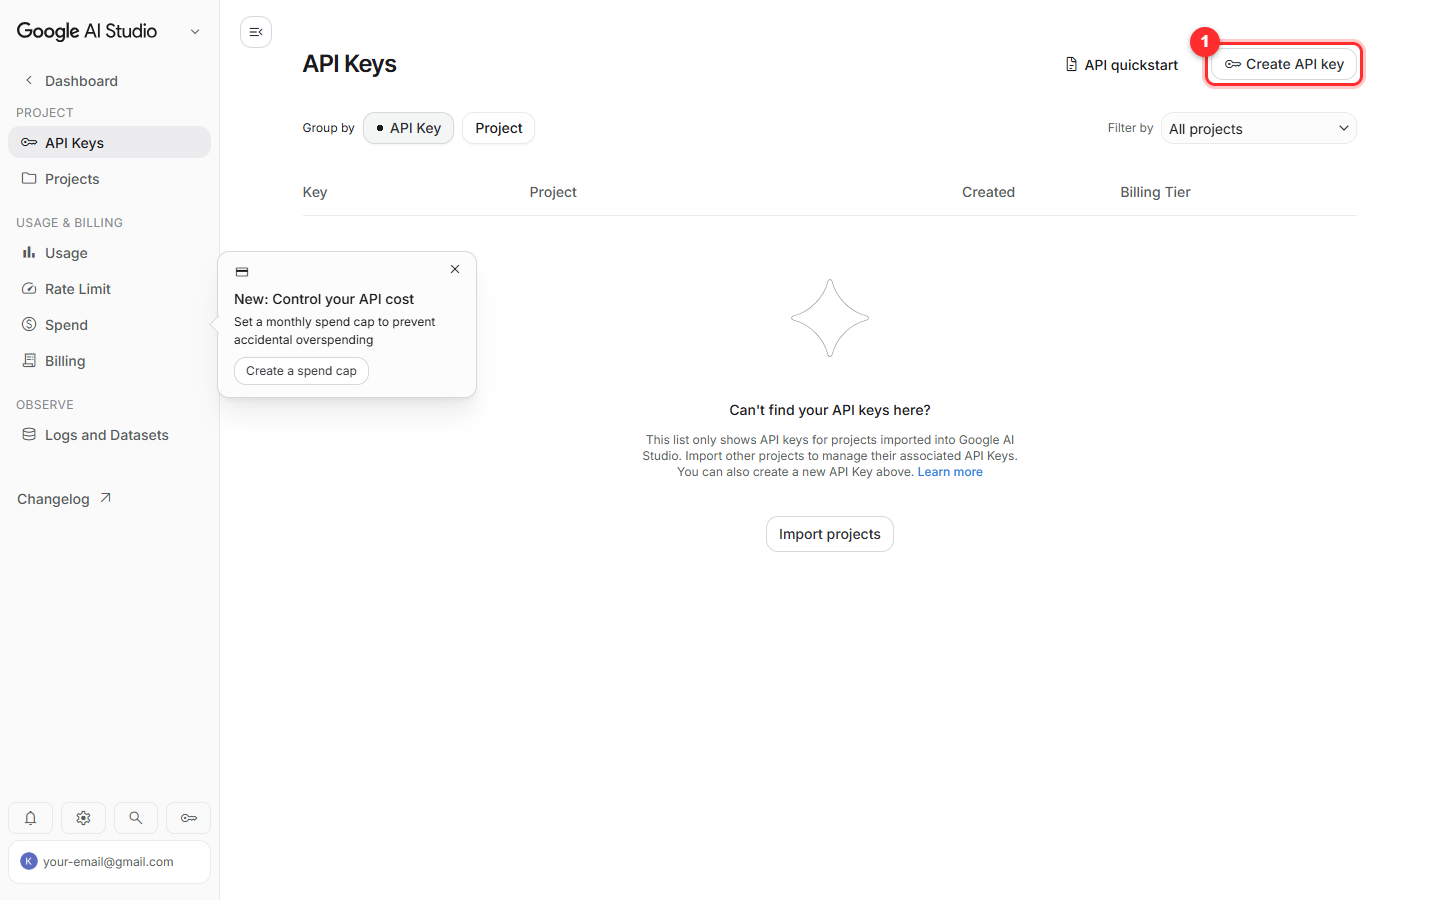
Once you are on the API Keys page, press ① Create API key in the top right corner.
Step 4: Don't rush — brand new accounts get stuck here
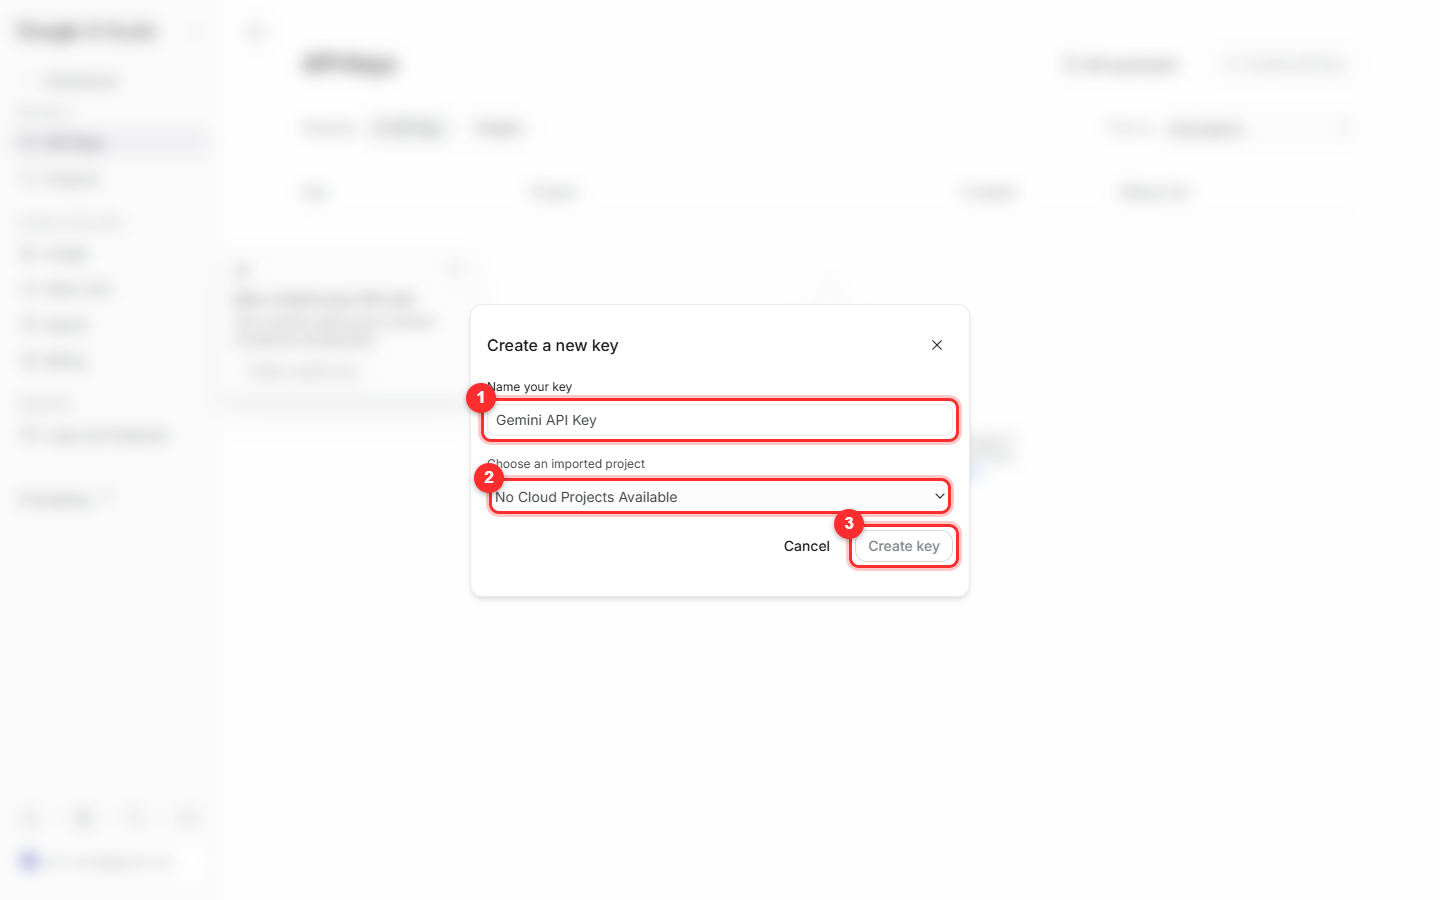
In the dialog, ① is the name of the key (the default is fine) and ② is where you pick a Google Cloud project. If your account is brand new, though, this says "No Cloud Projects Available", because there isn't a single project under your name yet.
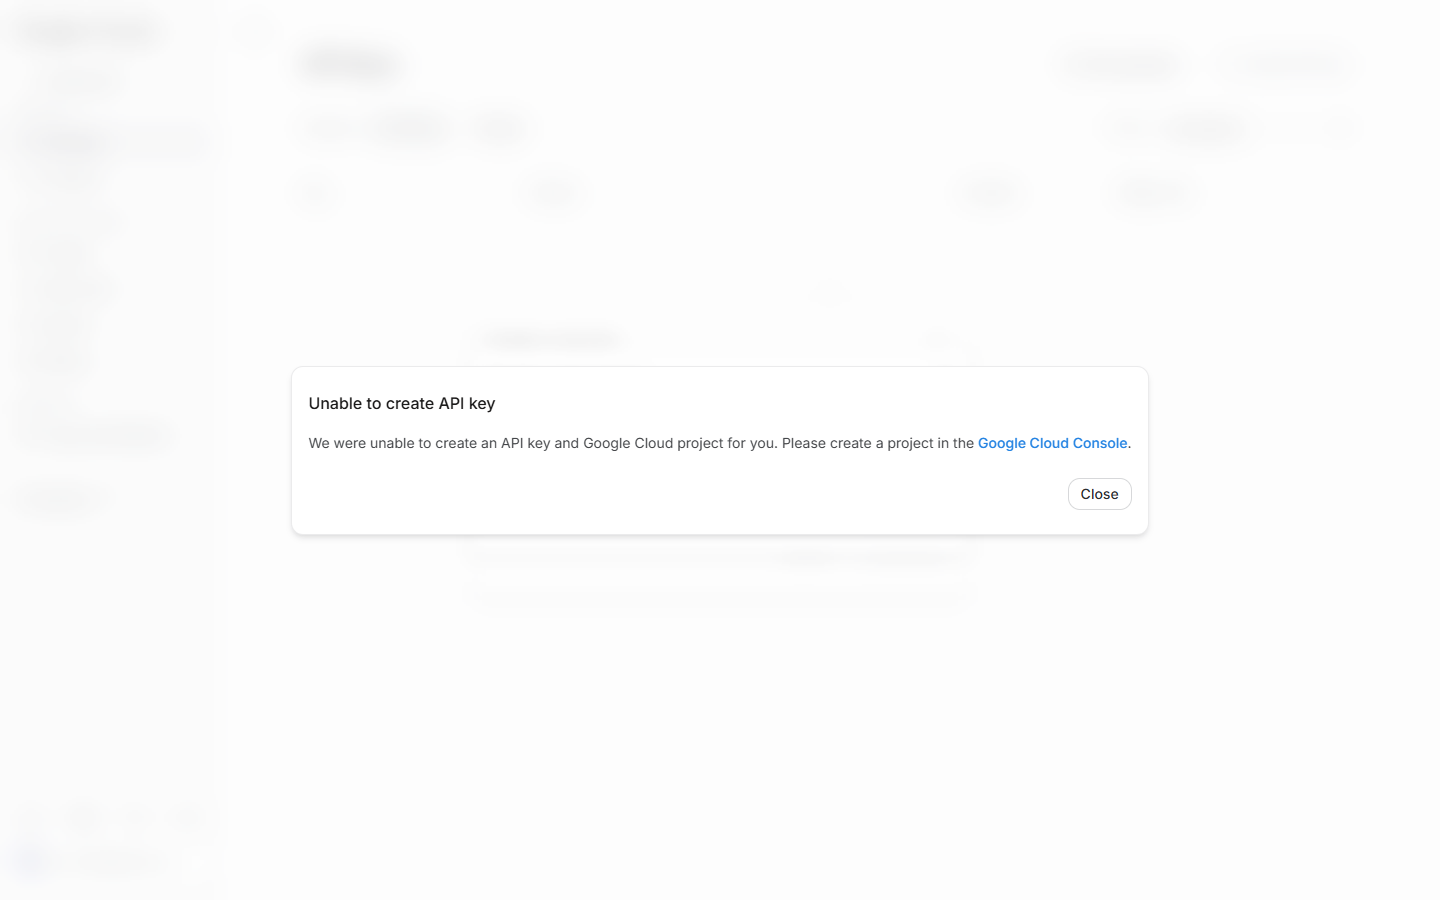
The drop-down does offer a "Create project" option, but in practice it fails on a brand new account: you get "Unable to create API key", telling you to go and create a project in the Google Cloud console yourself. So let's do exactly that — the next step goes and creates one.
Step 5: Create your first project in Google Cloud
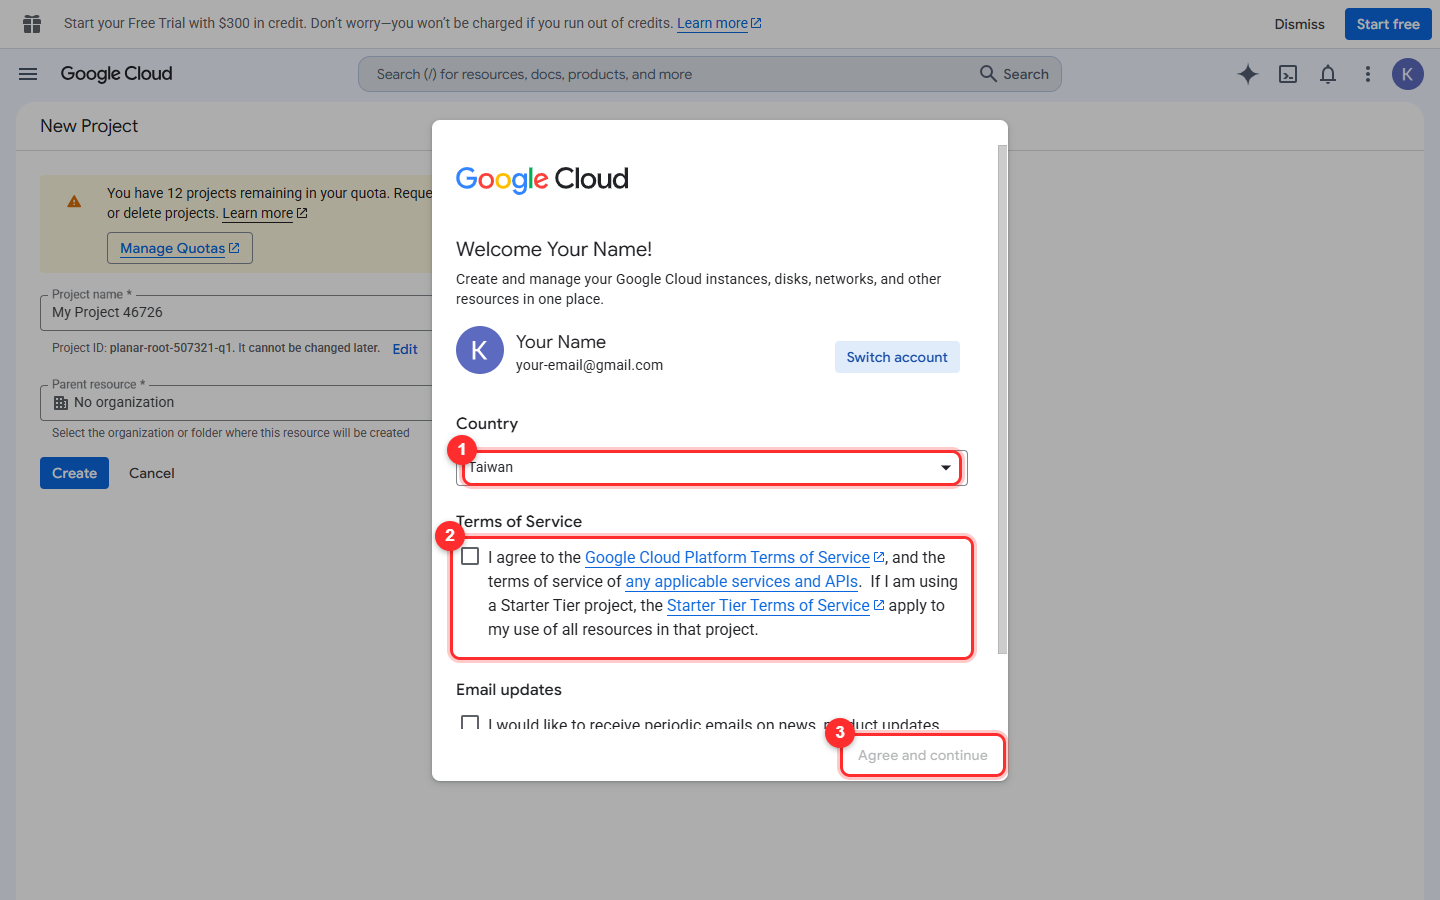
Open console.cloud.google.com/projectcreate. The first time you use it, a welcome and terms of service screen appears: ① check your country or region, ② tick the box to accept the terms of service (the email updates box below it is optional), then press ③ Agree and continue.
Step 6: Give the project a name and create it
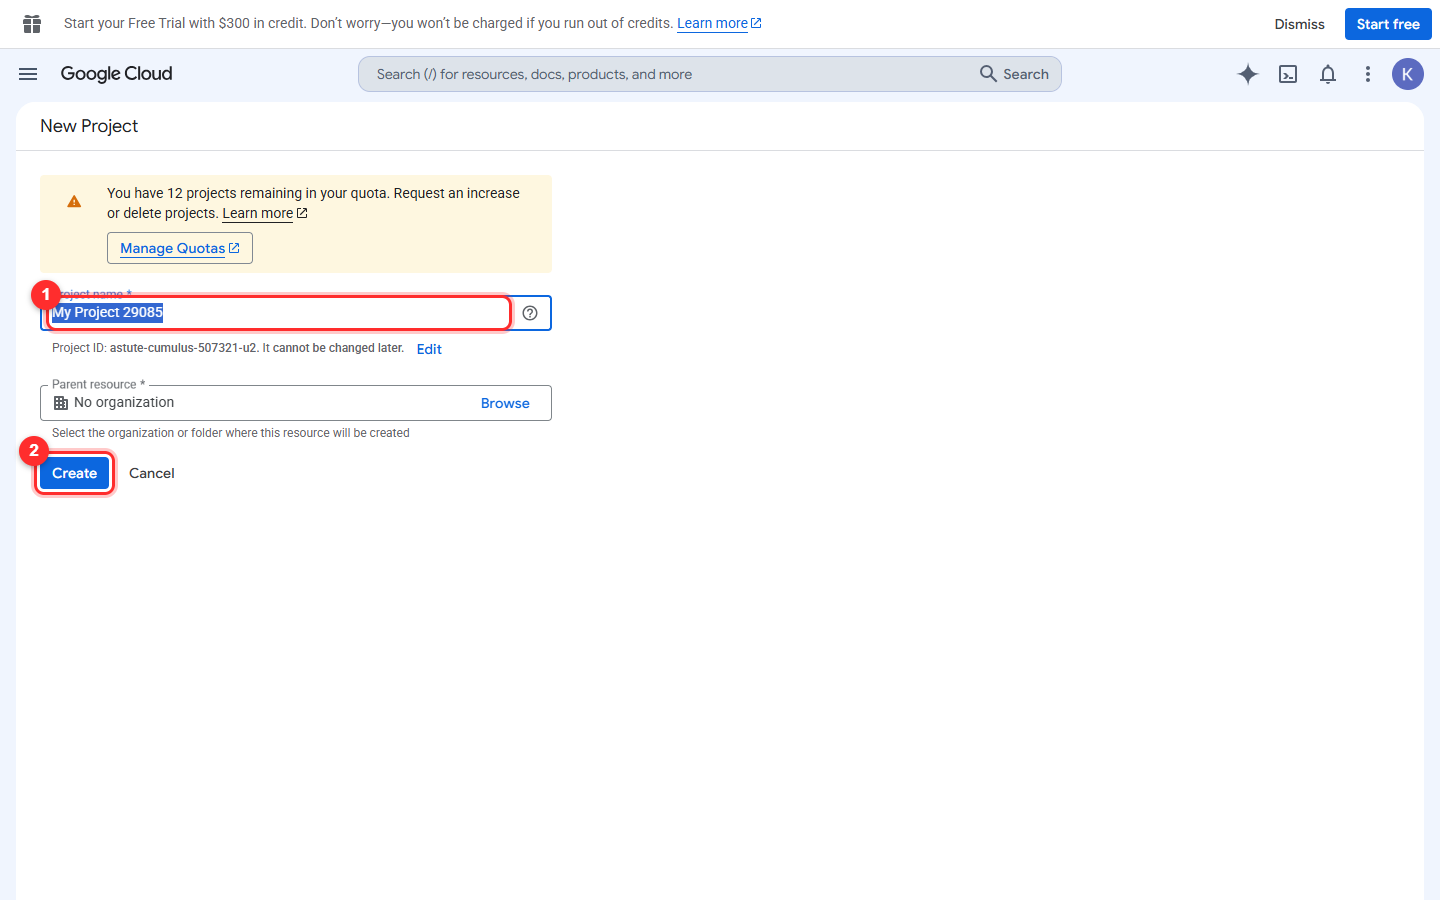
Type a name you will remember into the ① Project name box (cardking, for example), leave everything else as it is, then press ② Create. Give it fifteen seconds or so and the project is ready.
Step 7: Back to AI Studio to import the project
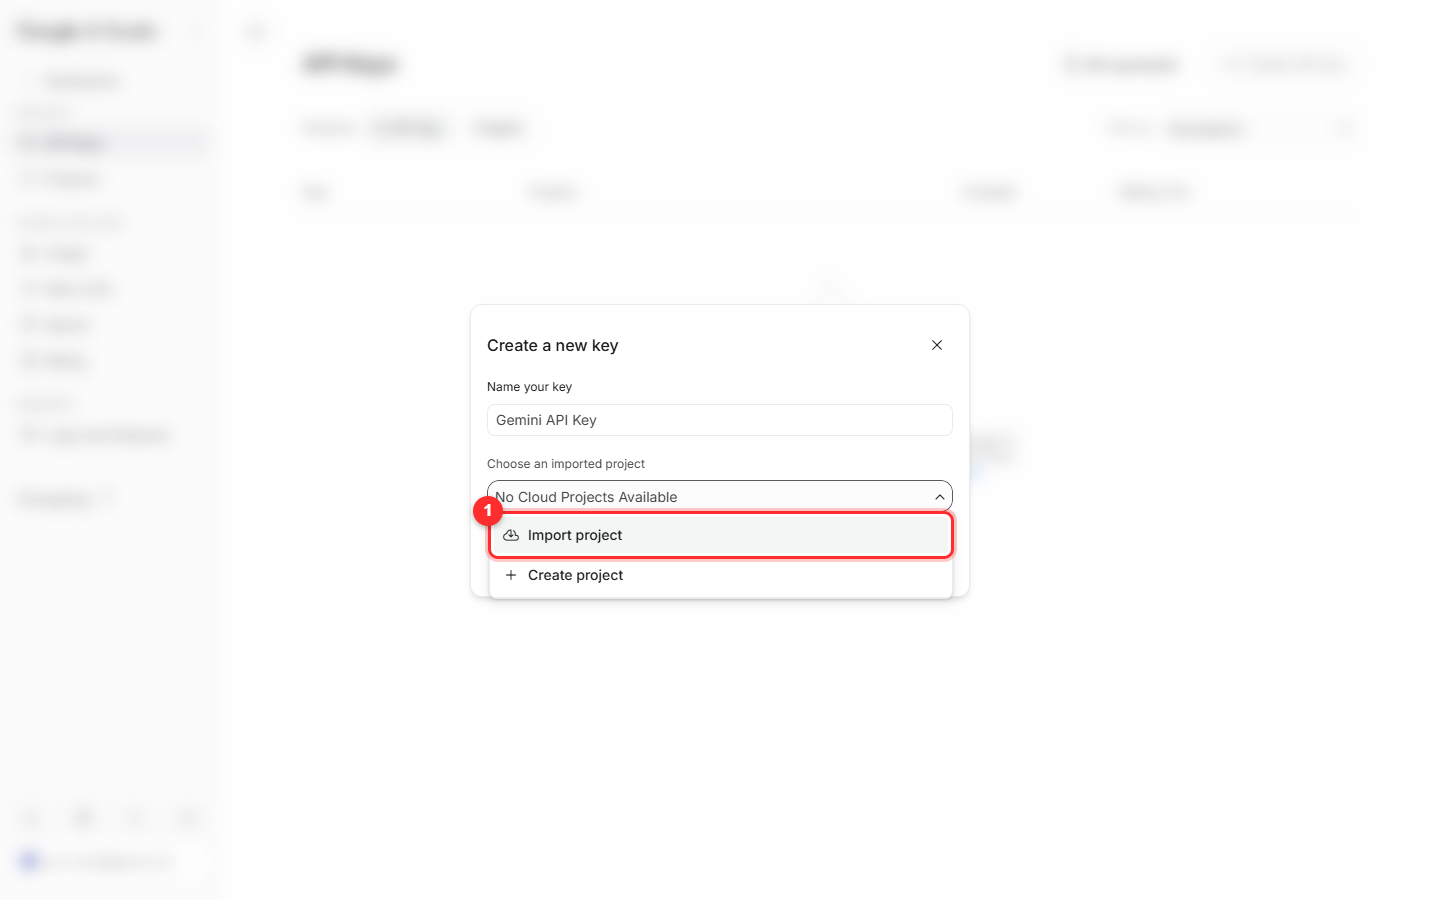
Go back to aistudio.google.com/apikey and press Create API key again. Now open the project drop-down and choose ① Import project. Note: a project you have just created does not appear in the list on its own — you have to import it.
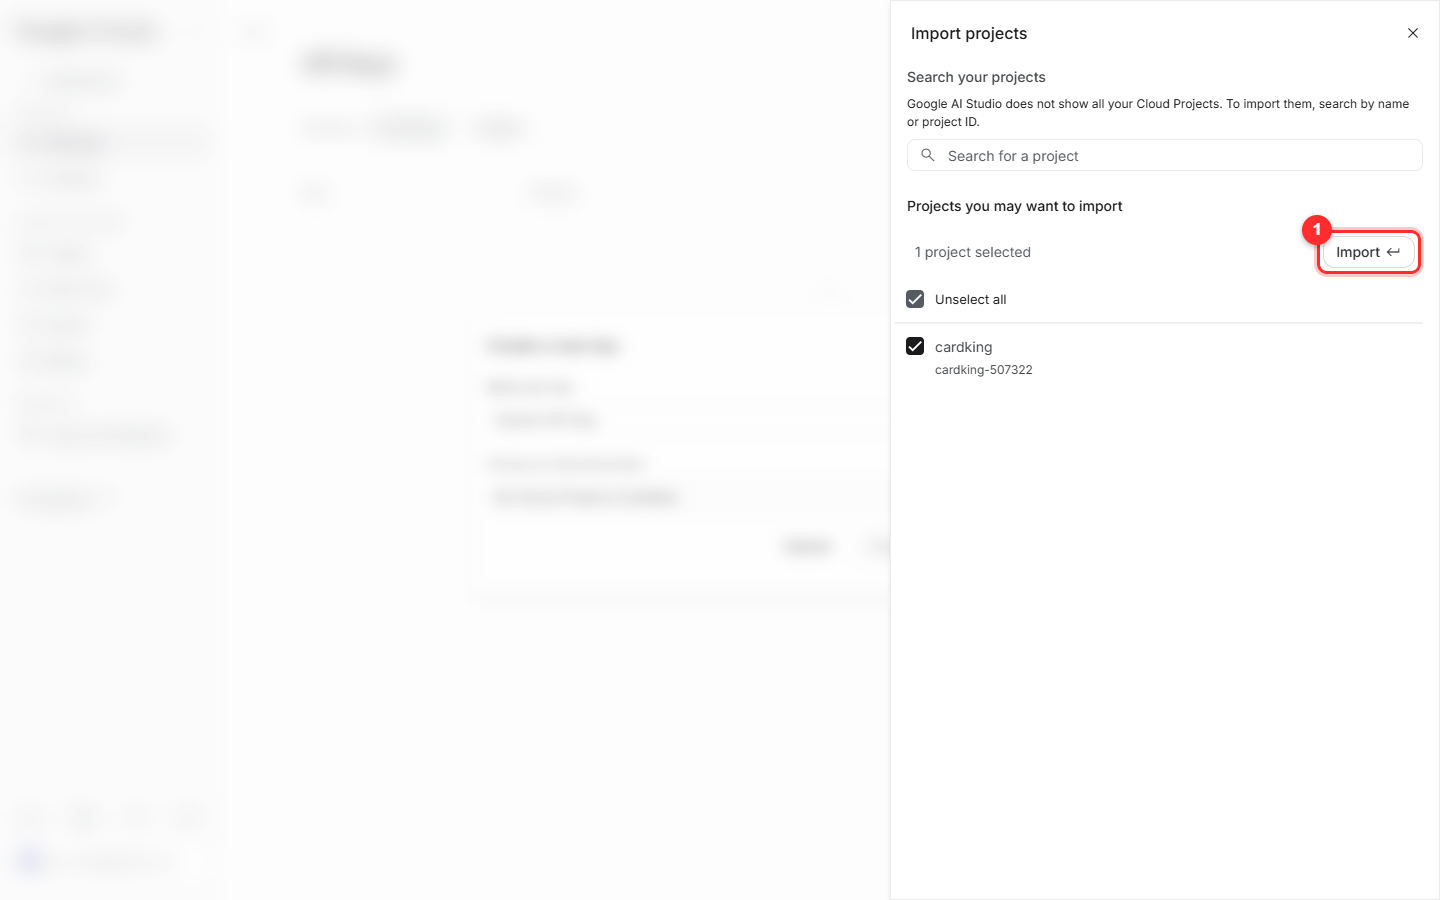
Step 8: Tick the project you just made, then press Import
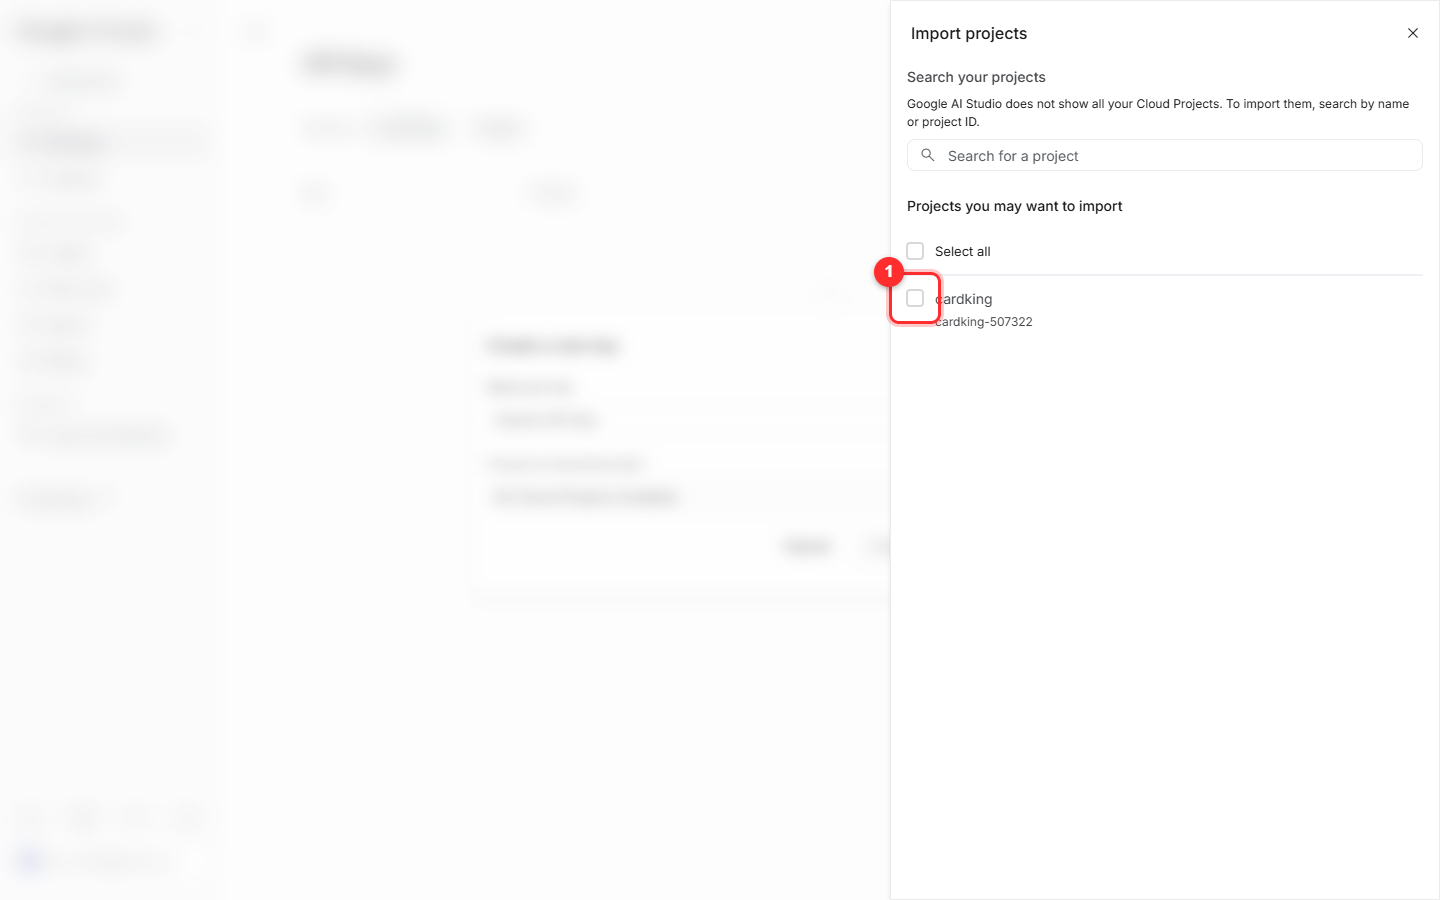
The project you created a moment ago shows up in the list. ① Tick it, then press ② Import.
Step 9: Create the key
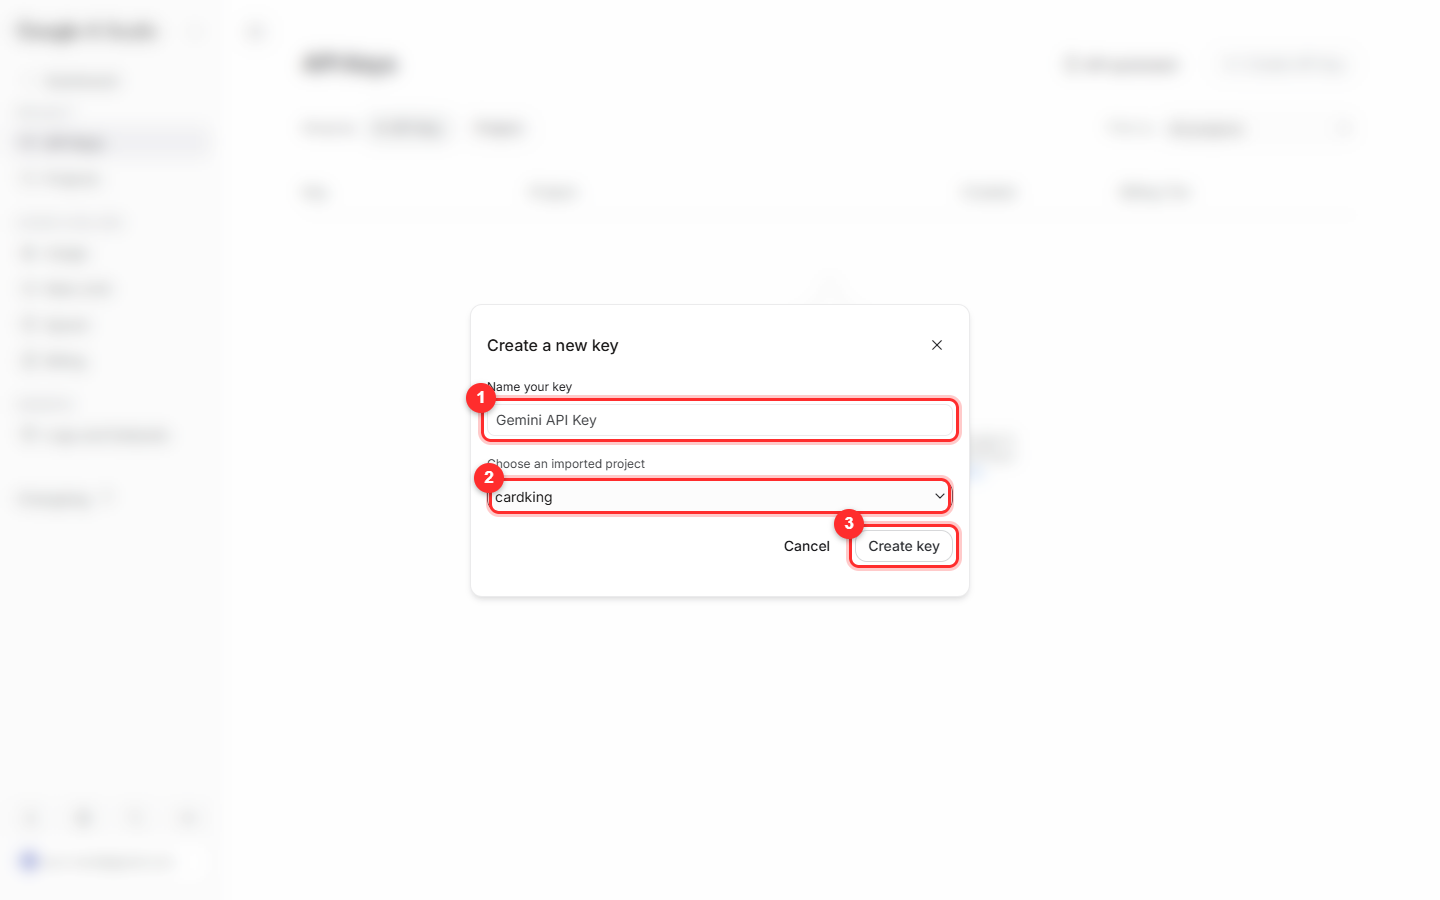
Once it is imported, ② the project box shows your project name. ① is the name of the key (the default is fine). When it all looks right, press ③ Create key.
Step 10: Copy the key and paste it into AI Card King
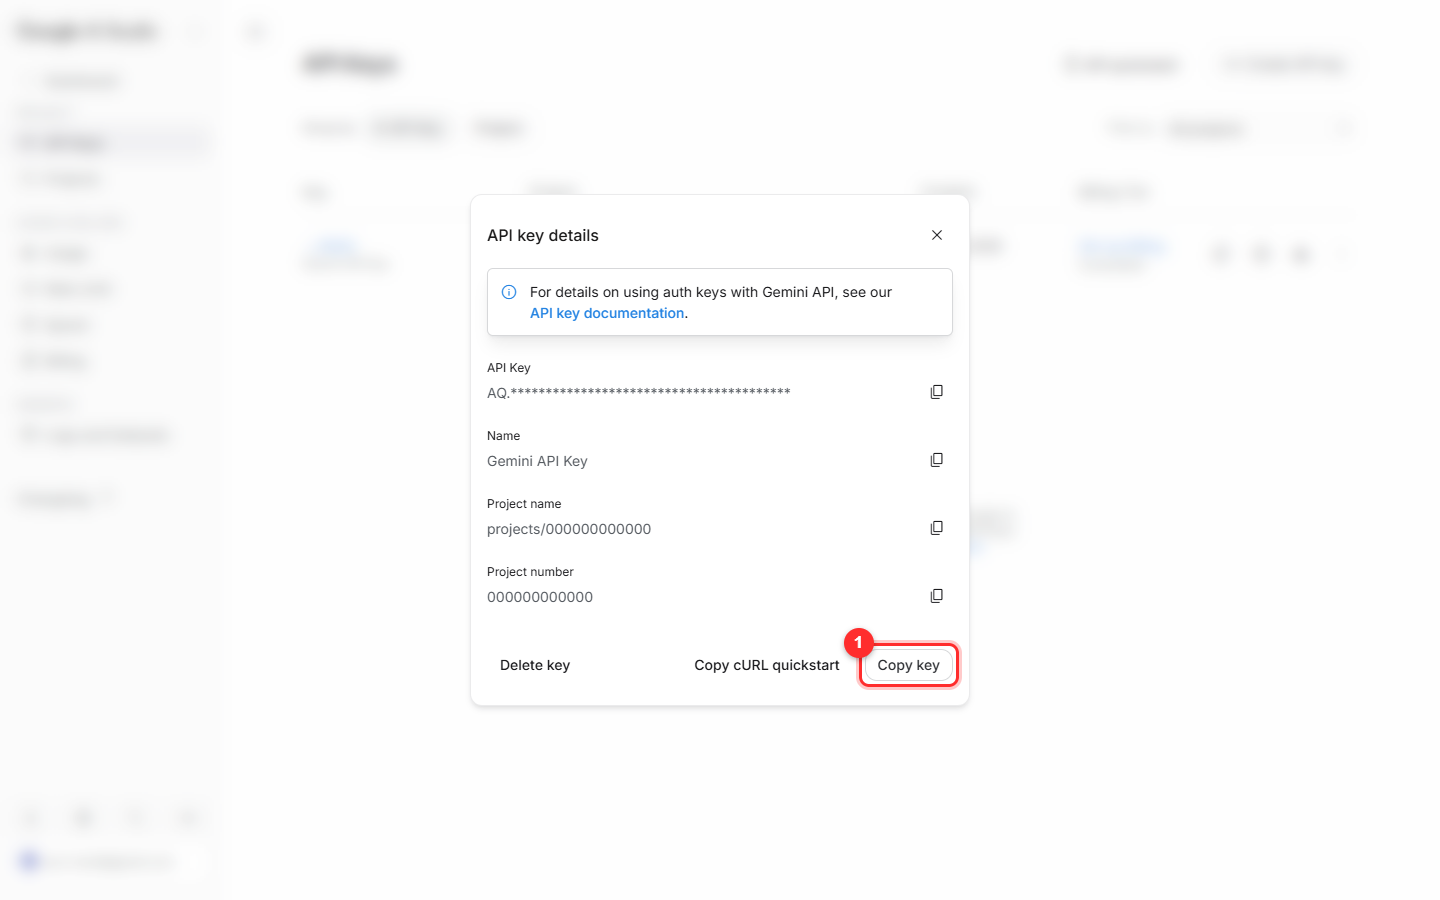
Your key is ready. Press ① Copy key, then open AI Card King, go to Settings, paste the key in, and you can start photographing cards. You can come back to this page and copy the key again any time, so there is nothing to memorise.
Look after your key
Treat this key like your wallet: anyone who gets hold of it can use your allowance to call the AI, and the bill lands with you. Don't post it in public groups or forums, and don't leave it visible in a screenshot. If it does get out, go back to the API Keys page in AI Studio, delete it, and create a new one.
About the free allowance
Google offers a free allowance for the Gemini API, and everyday card scanning usually stays inside it, with no credit card needed. The actual allowance and the way it is charged are whatever Google officially publishes, and Google can change them at any time.
If something goes wrong
I pressed create and got "The request is suspicious"
That is Google's automatic protection, and it often shows up on brand new accounts or when the same thing is tried several times in a row. Leaving it a while and trying again usually sorts it out. Do also make sure you are doing it by hand yourself, not through an extension or an automation tool.
The API replies "Your project has been denied access"
Again, this is the protection for new accounts. The key has been created but cannot be used yet, and it usually clears itself after a while. If it keeps failing, follow Google's instructions and report it to Google support.
I can't find the project I just created in the drop-down
That is normal. AI Studio doesn't list all of your Cloud projects automatically, so you have to bring it in once by hand with Import project in step 7. After that it stays in the list.
My key starts with AQ. instead of the AIza you see in other guides
That's fine, both are perfectly normal keys. Google has moved to a new key format, so newly created keys start with the AQ. prefix. AI Card King supports both formats, so just paste it in.
All done
Paste the key into AI Card King's settings page and you can start photographing cards. If you got stuck at any step along the way, do write in and tell us.